Dr.Fone - Phone Backup (Android): How To
Speaking of iCloud, you may think that it is an exclusive tool for iPhone data backup and restoration.
Many iPhone users just stop in front of an Android device despite its unique beauty. Why? One important reason is that they cannot let go of so much precious data backed up in iCloud.
Are these iPhone users consequently destined to stick with iPhone the whole life? Definitely no!
With Dr.Fone - Phone Backup (Android), you can easily download, preview, and restore iCloud backup to Android in minutes, without affecting existing Android data and settings.
Follow the steps below to restore iCloud backup to Android devices.
Step 1. Connect your Android device to PC.
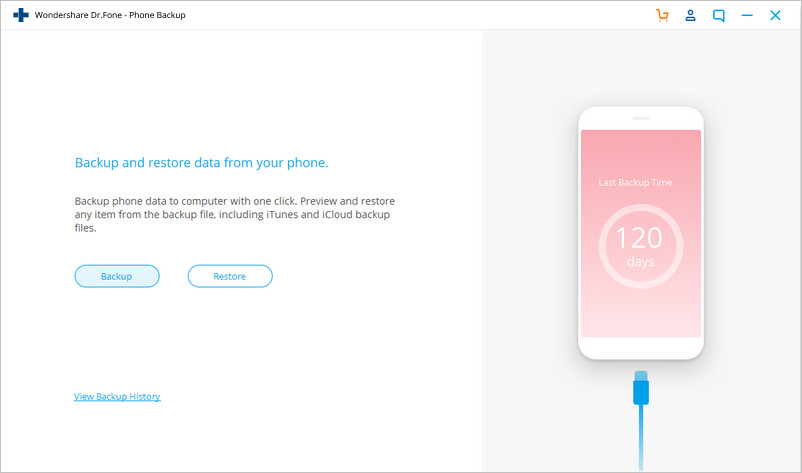
Download, install, and launch the Dr.Fone tool on your PC. In the main screen, select "Phone Backup".

Use the original USB cable of your Android phone to connect it to the PC. Then click the "Restore" button in the middle of the screen.
Step 2. Sign in to your iCloud account.
In the next screen that shows up, select "Restore from iCloud backup" from the left side.
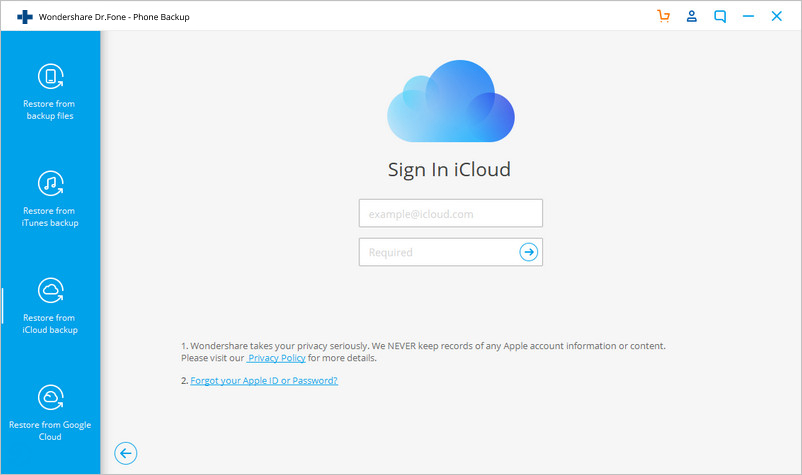
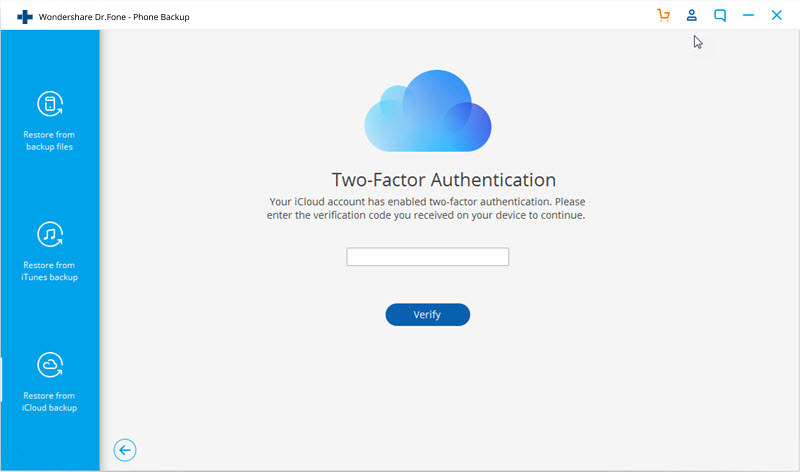
You may have enabled the two-factor authentication for your iCloud account. In this case, a verification code will be sent to your iPhone. Find the verification code and input it in in the following screen, and click "Verify".
Step 3. Restore the iCloud backup data to your Android device.
Now you have signed in to your iCloud. All the backup files are listed in the Dr.Fone screen. Select one of them and click "Download" to save the file to a local directory on your PC.
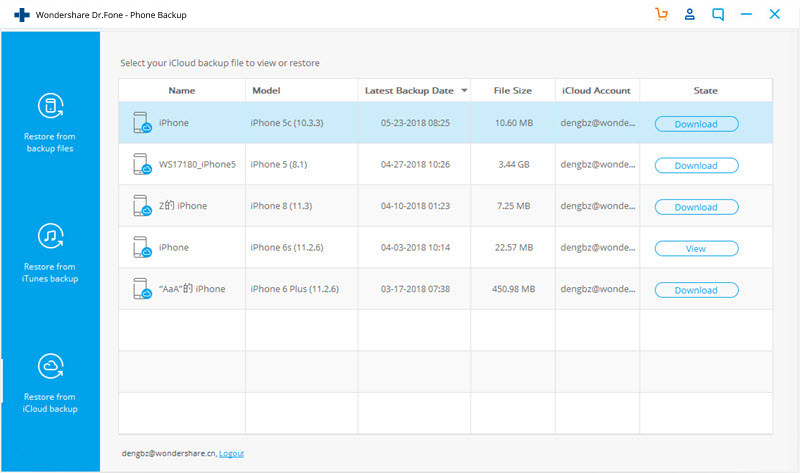
Then Dr.Fone will read and display all the data from the downloaded iCloud backup file. Click a data type and preview what information is stored in it. Then you can select some or all of the data items and click "Restore to Device".
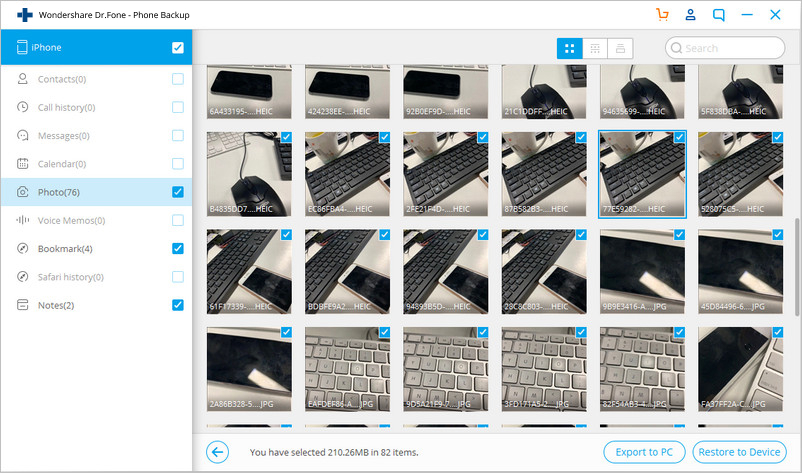
In the dialog box that is displayed, select an Android device in the drop-down list, and click "Continue".
Note: An Android device does not support such data types as Voice memos, Notes, Bookmark, and Safari history.


