 データ復元(iOS)
  起動障害から修復(iOS)
  画面ロックを解除(iOS)
 - iPhone/iPadのロック解除&Apple ID解除
- iCloudのアクティベーションロック解除
- iPhone MDMロック解除
- スクリーンタイムパスコードのロック解除
- iPhoneからiTunesの暗号化を解除
- iPhone SIMロック解除
- WindowsパソコンでのiOS脱獄
- MacOSでのiOS脱獄
 スマホ管理(iOS)
 バックアップ&復元(iOS)
 WhatsAppデータ転送(iOS)
  データ消去(iOS)
 Dr.Fone Air
 iOSをPCに画面ミラーリングする方法
スクリーンミラーリングのプロセスは、時間を無駄にせずに小さな画面ではなく大きな画面で表示するのに非常に役立ちます。iOSデバイス用のスクリーンミラーリングを提供する多くのサービスがありますが、不正確で効率的ではありません。このガイドでは、Wondershare Dr.Foneの力を借りて、iOSデバイスをワイヤレスで接続する方法を紹介します。


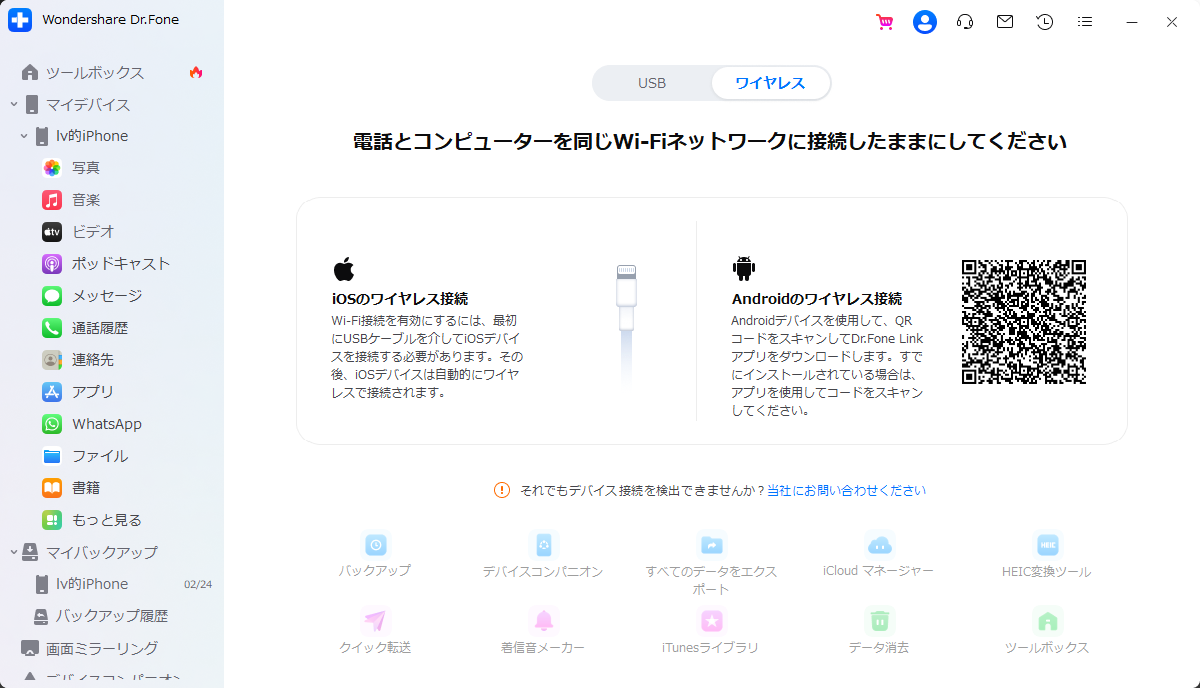
iOSデバイスをワイヤレスで接続
Wondershare Dr.Foneをコンピューター上で起動し、デバイスコンパニオンを使ってiOSデバイスを接続して、スクリーンミラーリングを行います。開始する前に、マイデバイス > Wirelessに移動してiPhoneとの接続を確立してください。初めて接続する場合は、iPhoneをUSBで接続する必要があります。
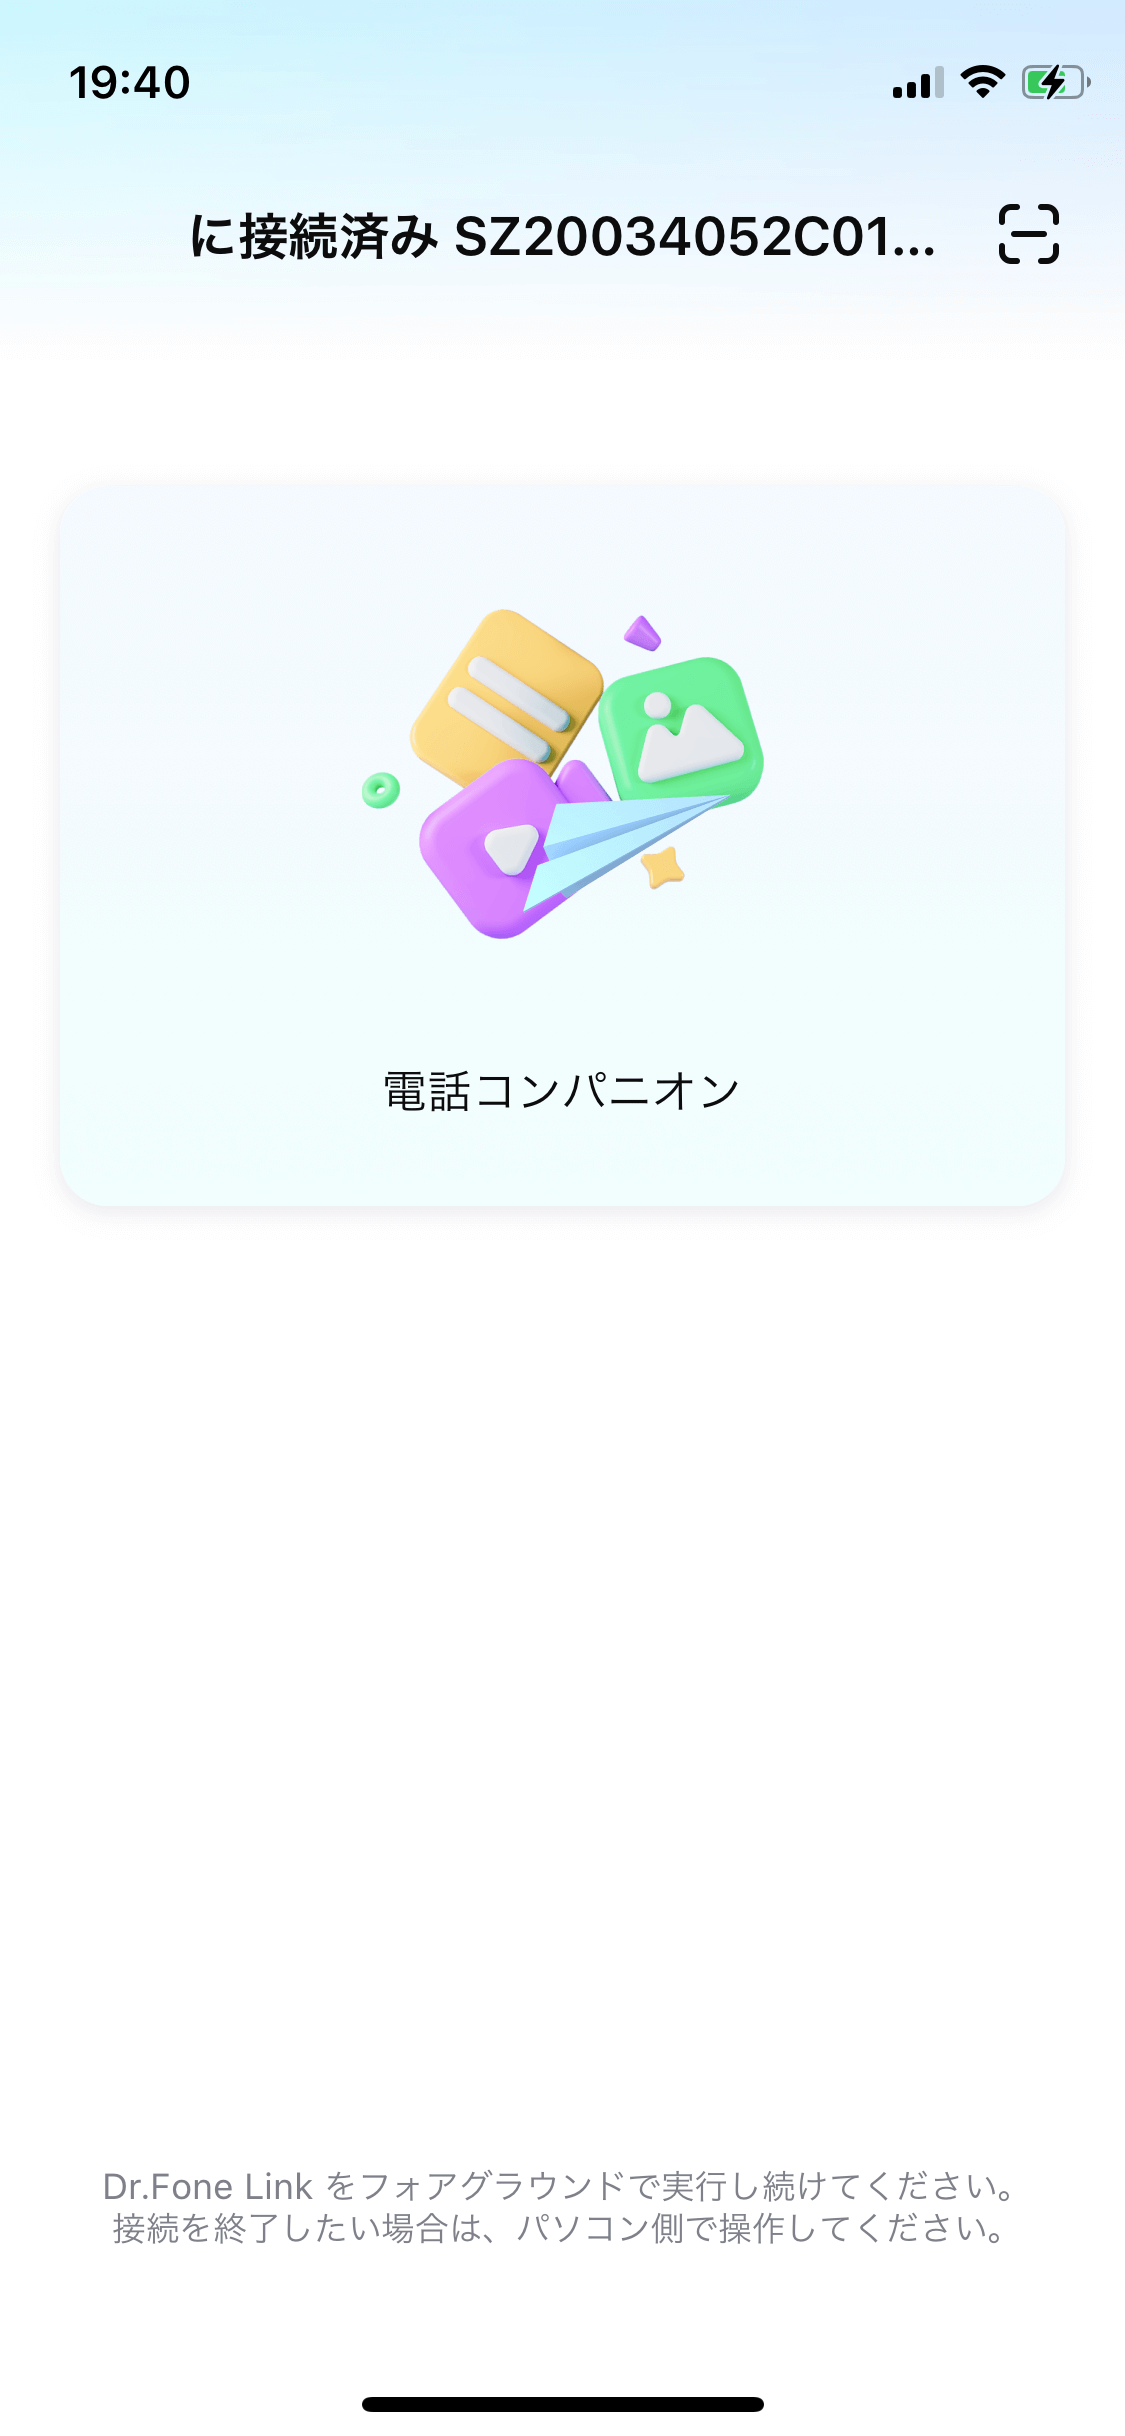
接続が確立されたら、左パネルからスクリーンミラーに移動してください。コンピューターの画面にあるQRコードをスキャンすると、iPhoneにDr.Fone Linkをインストールするように表示されます。
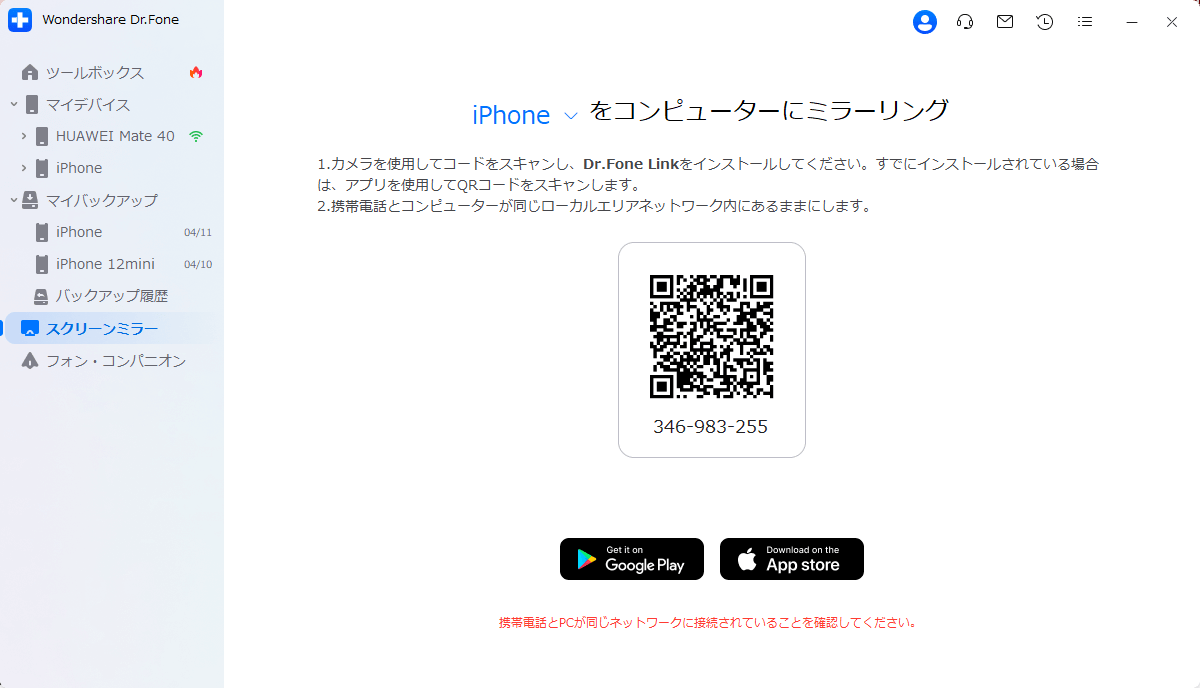
Dr.Fone Linkを開き、右上にあるQRコードのスキャンアイコンをタップして、操作を続けてください。スマホとコンピューターが同じネットワークに接続されていることを確認してください。
新しい画面にリダイレクトされ、スクリーンミラーリングの接続が確立されます。コンピューターで、Dr.Foneがスクリーンミラーリング接続を促していることを確認してください。プロセスを終了するにはミラーリングの終了をクリックしてください。

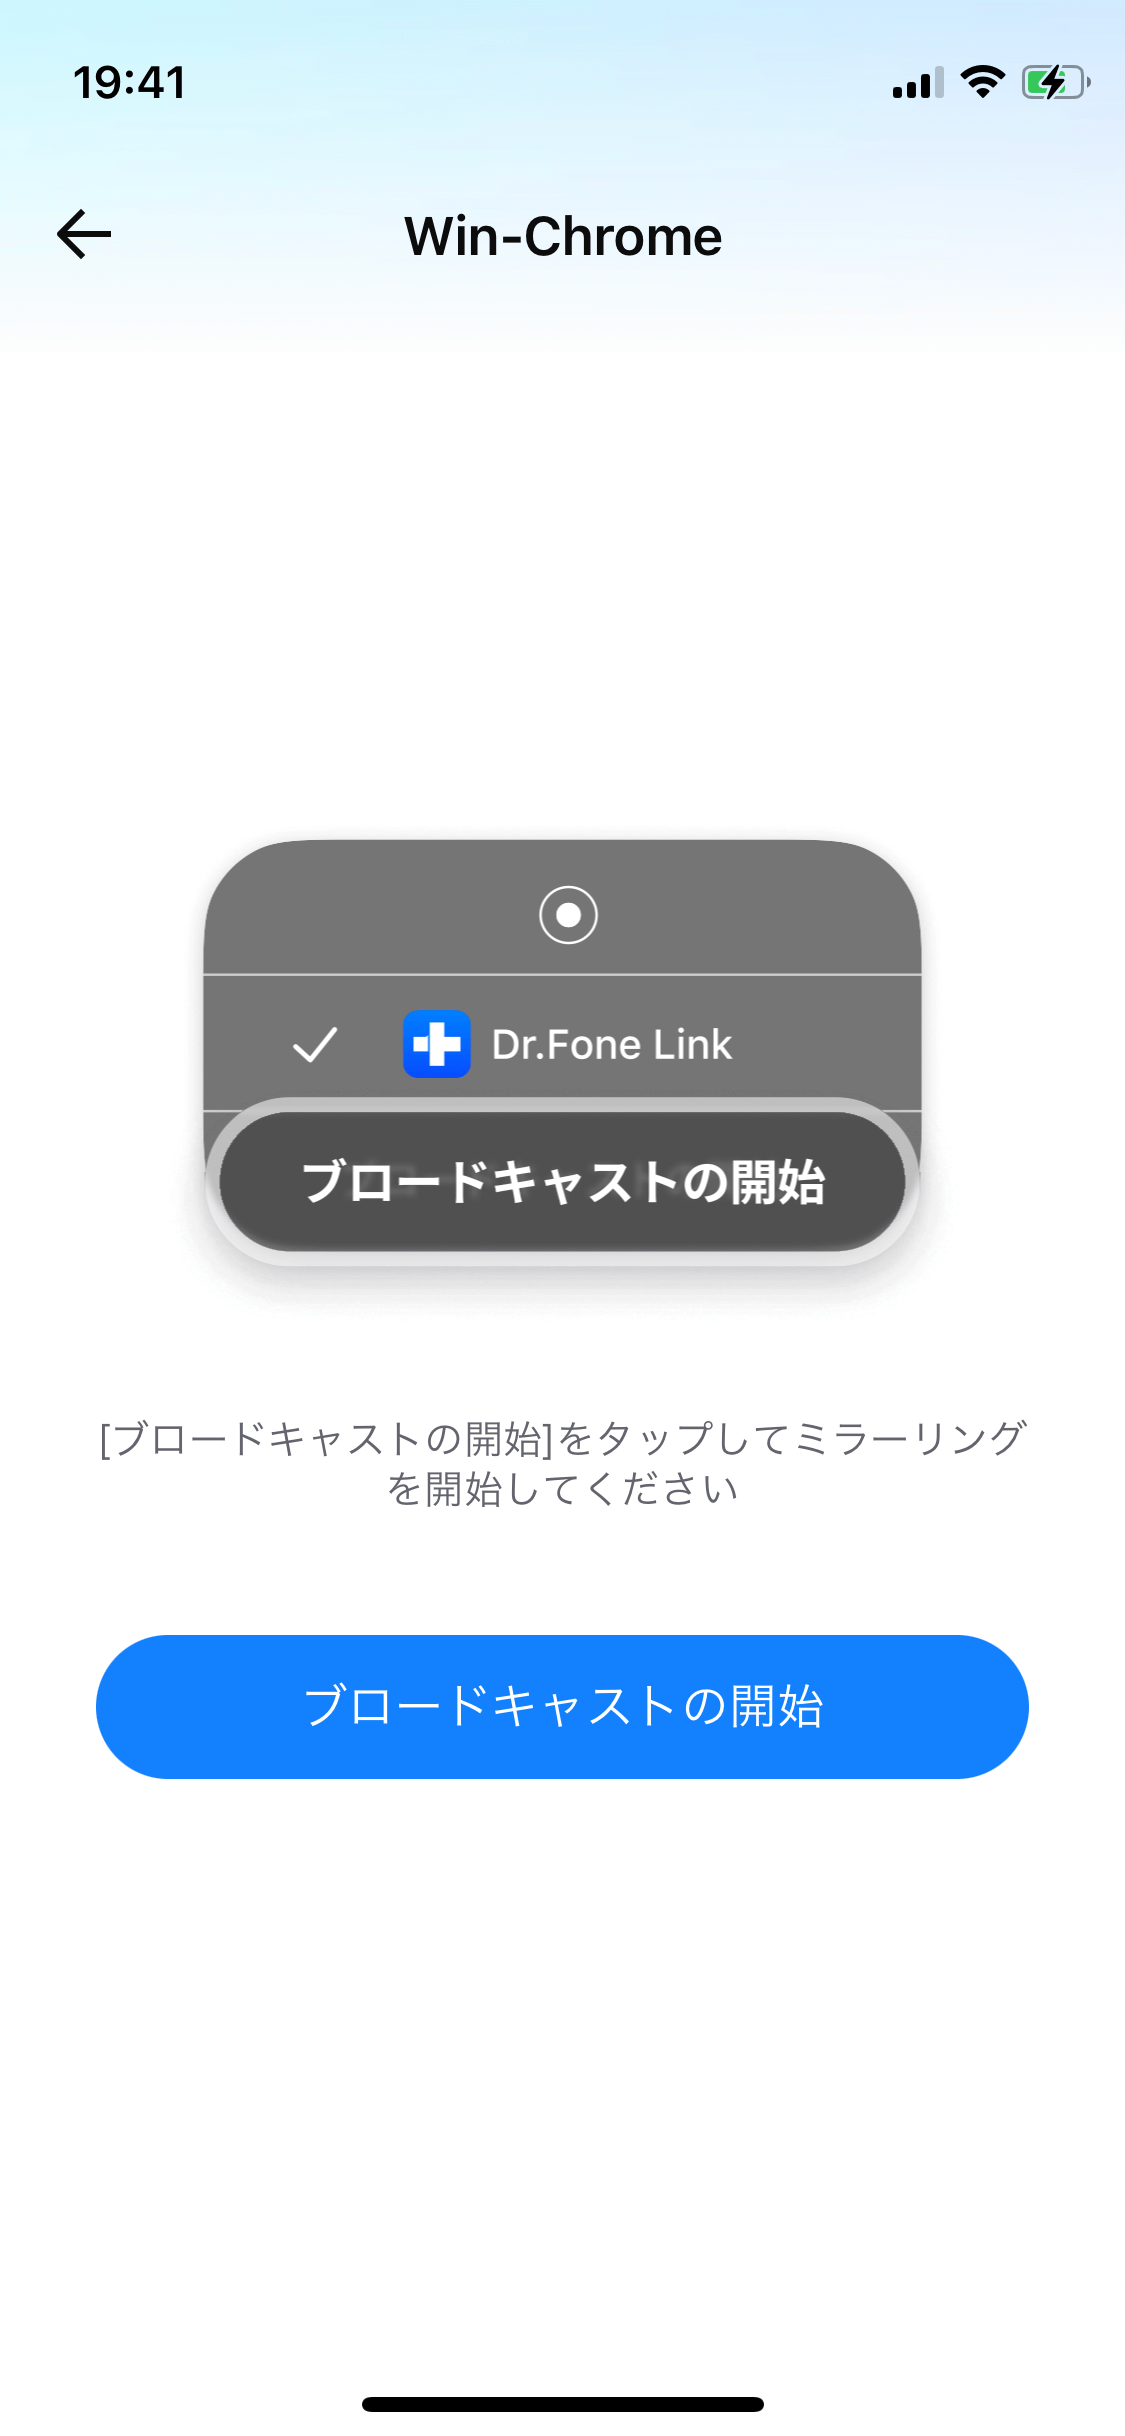
同様に、iPhoneでもブロードキャストを開始してコンピューターでiPhoneのミラーリングを開始するように促されます。 ブロードキャストの開始をタップして、画面の指示に従ってミラーリング接続を開始してください。
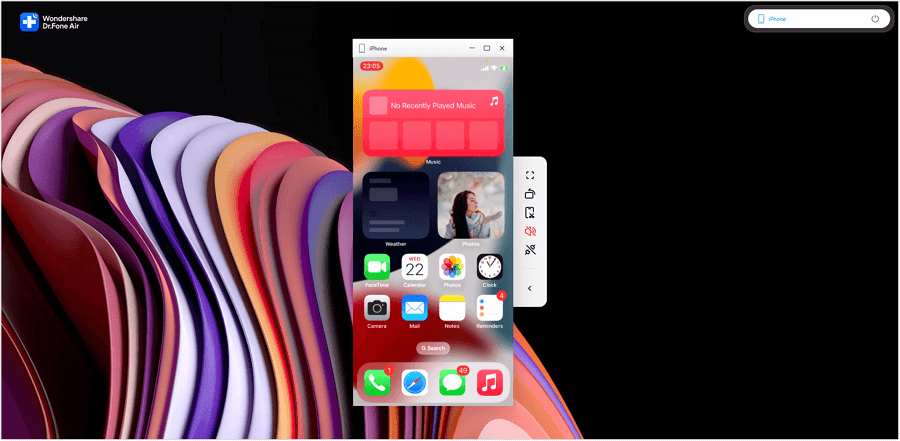
ディスプレイにミラーリングされた画面が表示されると、iPhoneがコンピューターに接続されたことを伝えるメッセージが表示されます。デバイスがミラーリングされるまで、デバイスの時間表示付近が赤くなっているのが観察できます。
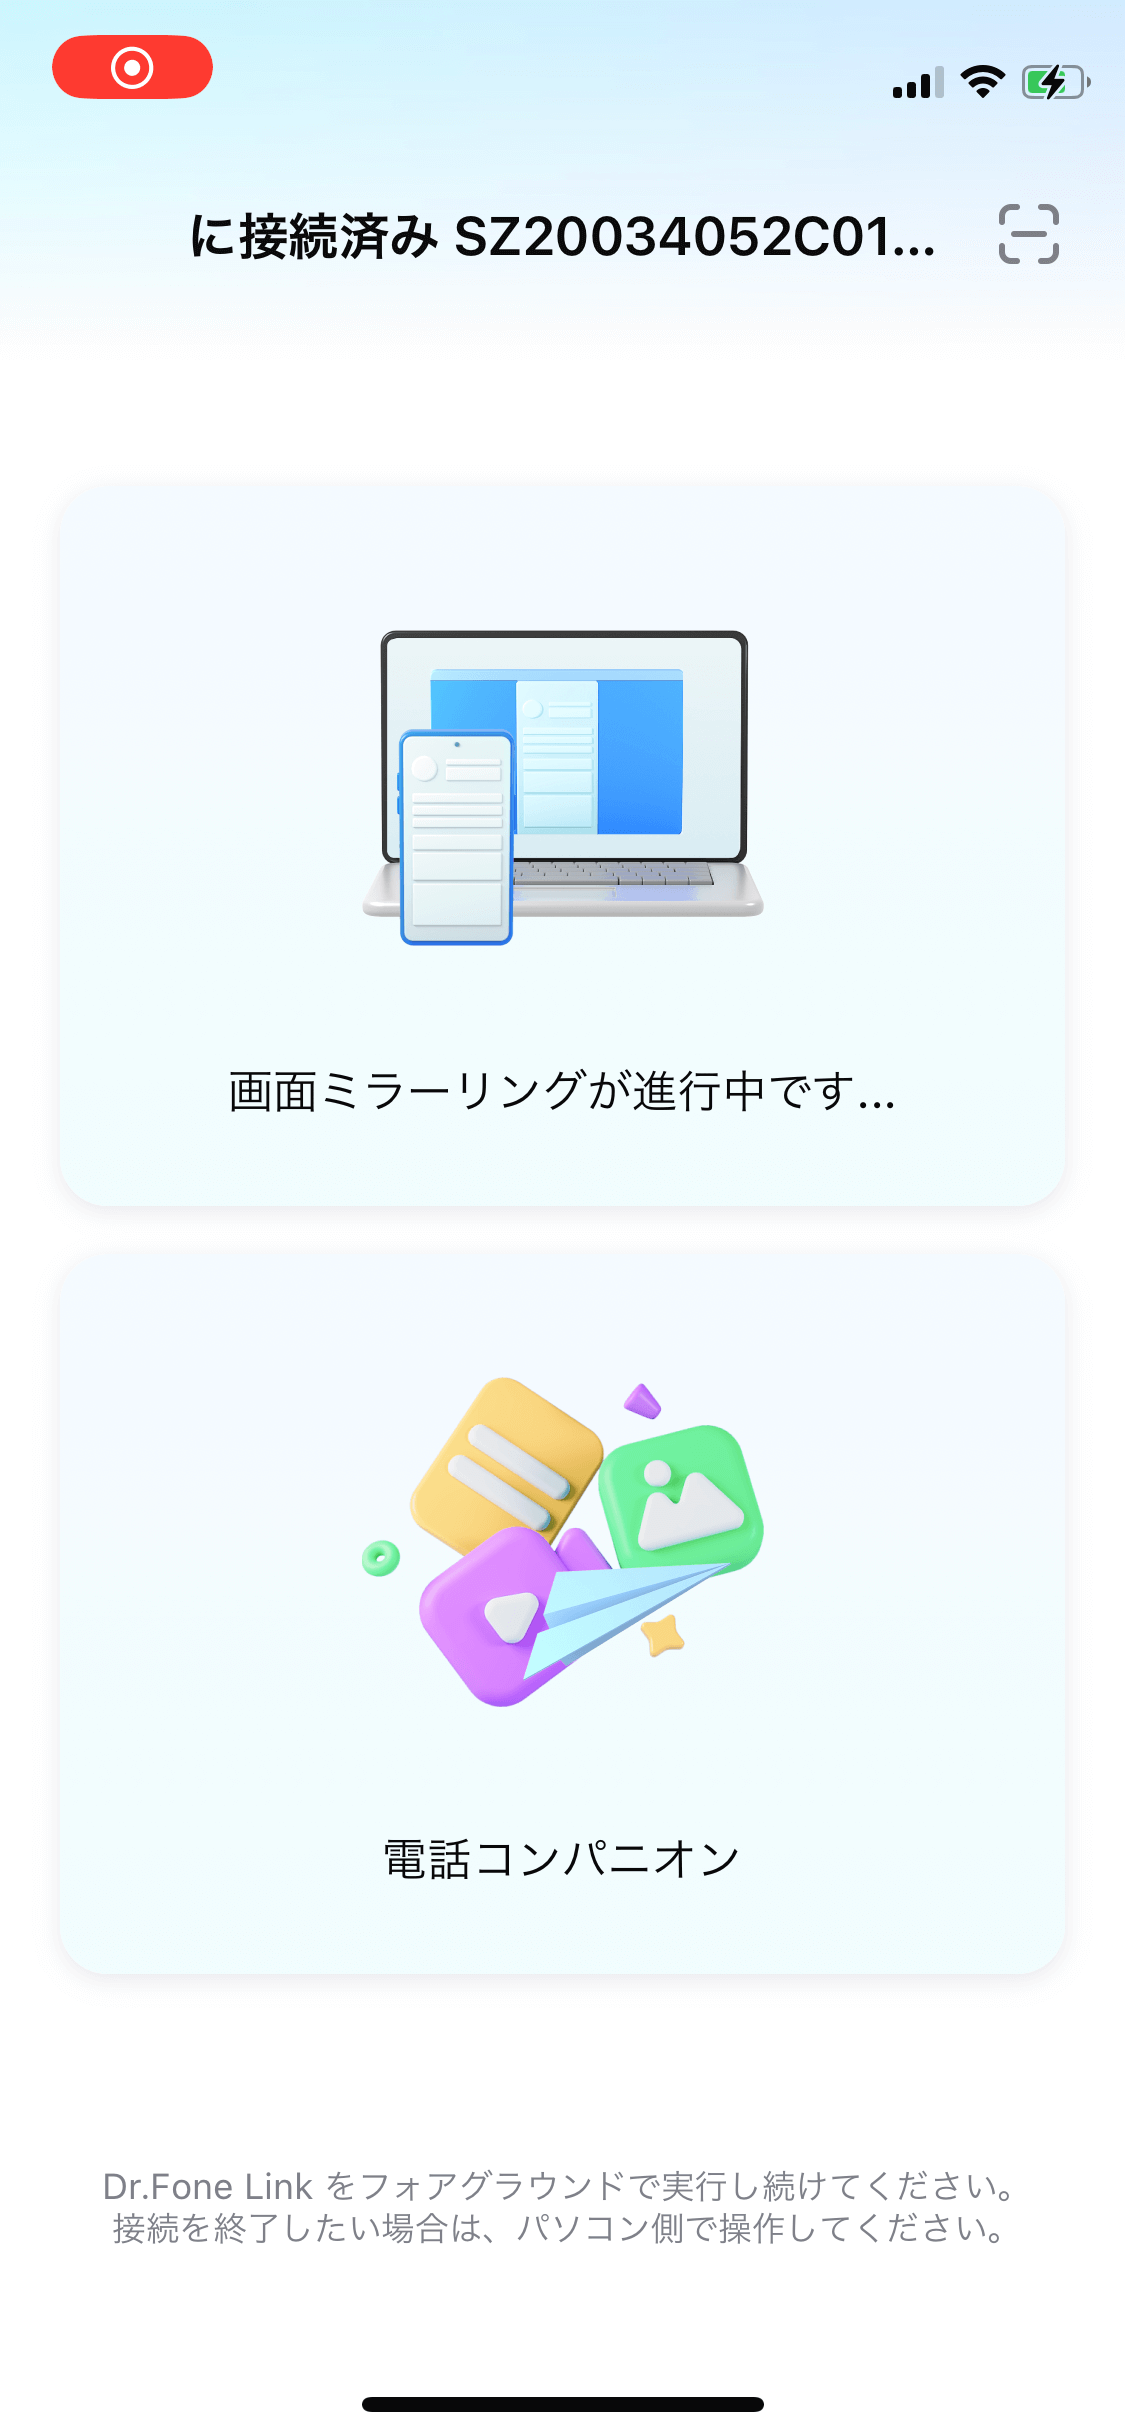
スクリーンはコンピューターにミラーリングされ、「Dr.Fone Air」で表示されます。ミラーリングされた画面では、スクリーンショット ボタンでデバイスの画面のスクリーンショットをPC上で撮影できます。必要に応じて画面を回転させることもできます。